Bathroom Makeover: 5 Easy DIY Soap Ideas

For a product that has celebrated over 6,000 birthdays, soap is still a fresh part of our daily routines. In fact, modern soap offers delightful fragrance and sudsy cleanliness in one humble, hard-working bar. If your crafty aspirations extend to a new look for your bathroom, DIY soap is a fun way to make it happen. Soap ingredients are far easier to come by than they were hundreds of years ago, and the range of options you’ll have for creating bars is nearly limitless. Fun colors, scents, and ingredients all let you make your own soap with minimal effort.
A Few Simple Soap Ingredients
Are you nervous about using lye to make your soap? Good news – you don’t have to! You can learn how to make bar soap easily by using a special kind of soap base called melt-and-pour, or MAP. Beginner-friendly, this soap comes in clear, colored, opaque and even goats’ milk varieties. These soap bases will come in slabs that you can cut or break off, depending on the size of your intended soap batch. It can either be melted in a double boiler on the stove or in small amounts using a microwave, giving you a liquid that’s easy to color, scent and pour.
If you’d like to create shapes or traditional bars, you’ll also need a few molds, which typically come in firm plastic or silicone. These can be purchased through online soap-making specialty stores. Most molds offer several cavities, enabling you to make several bars of soap with a single pour. Some of the more heavy-duty molds created with chocolate-making in mind can even be used for soap making. Just be aware that for the sake of food safety, molds should be used for either soap or food - not both. Fragrance or essential oils and soap colorants are another way to customize your finished soap creations. Refer to manufacturer or soap recipe instructions to ensure the best results.
How to Make Your Own Soap
Position your molds on a flat tray that's easy to move - a cookie sheet works well. Then pick a place where they can be left without being bumped or disturbed for at least a few hours. Once your melt-and-pour base has been liquefied in a double boiler or a few trips to the microwave, you're ready to start creating. Some at-home soap makers find it's easiest to control when the liquid base is transferred to a vessel with a spout, such as a glass measuring cup from your kitchen. If you're planning on adding color or glitter to your soap, you can simply mix it into the liquid base before pouring.
While the liquid soap is still hot, pour carefully into your soap mold cavities until they're each about 90-95% full. Slide your stable tray of filled molds into your "safe spot" and leave your soap to cure for the time specified in your melt-and-pour manufacturer's instructions. Once it’s solidified, pop the finished soap out of each mold and use cling wrap or tight plastic bags right away to keep your soap looking fantastic in storage.
Five Fabulous DIY Soap Ideas
Once you've had a chance to experiment with different soap bases and add-ins, you can spread your creative wings and make some incredible personalized soaps. Here are 5 ways to transform your new homemade soaps:
- Sponges: Adding slices of natural sea sponges to a shallow, round mold before pouring gives you a 2-in-1 soap bar with a spa-like lathering experience. This works with loofah sponges as well!
- Shellegant: Use a seashell or sea star-shaped soap mold to make usable ocean treasures; pile them up to accentuate a beachy tray on your vanity top,
- The Thoughtful Hostess: Slip a wrapped, personalized soap into the pocket of a luxe bathrobe to delight guests or to give as a one-of-a-kind gift for special occasions.
- The Sparkling Surprise: Jewelry-revealing bath products are very popular - why not give it a try in your new soaps? Use a small plastic bubble or other waterproof casing to hide a fun piece of costume jewelry in a thick soap bar design for friends and family to discover.
- The Weekender's Secret: Keep your overnight luggage fresh and beautiful by tucking a scented bar of your new soap in a mesh pocket or fabric panel inside. The next time you open it, you'll be greeted by fabulous fragrance and a ready-made bar of travel soap!
Homemade bar soap has become a very popular hobby among creative DIY enthusiasts, who love that the journey from raw materials to finished products only takes a few hours. If you're ready to explore this lovely, lather-filled experience for yourself, just remember to be creative and have fun with it!
Other Articles You May Be Interested In
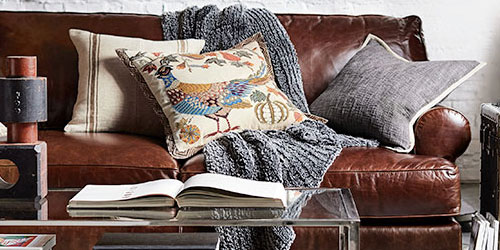
When you take great care of your leather furniture, it can last for decades and become even more comfortable.
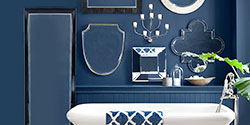
With just a few simple pieces, you can update the look of your bathroom in a snap.
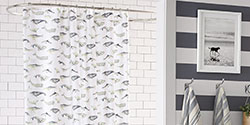
After much deliberation, you've selected the perfect shower curtain.