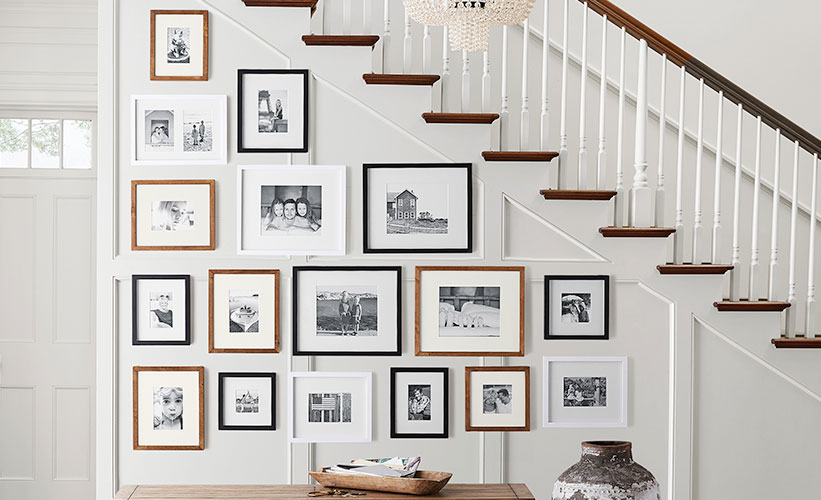
Creating a Staircase
Photo Gallery

Creating a staircase photo gallery allows you to transform a frequently passed wall into something truly special. Although you can certainly use this blank canvas to hang decorative art, it’s an ideal space for displaying personal photos too. From family portraits to school photos, your favorite photos become your own personal works of art when you arrange them in frames and hang them on the wall together.
Choose a Gallery Style
Arrange your staircase gallery in an asymmetric cluster for a charming, vintage look, or use a formal grid style for a more polished effect. This casual approach provides a fuss-free gallery with plenty of nostalgic appeal.
Framing Makes All the Difference
The way you lay the photos out in their frames also affects the finished look and turns your photos into art. For example, you can create a checkered effect by mixing two different frame sizes in the gallery, each with a different mat size. Arrange them in checkerboard fashion. For a very formal, cohesive look that makes a bolder statement, use square frames with the same photo mat size. Arrange them on the wall with a consistent, even amount of space between all the frames.
Practice Makes Perfect
Before you add any nails to the wall, plan the way you want to arrange the images. Tape off a section of the floor in the same size and shape as the wall that’s along your staircase before laying your framed photos on the floor in the arrangement you plan to use for the gallery. Use a measuring tape to figure out the width and height of the wall before taping off the floor with painters tape. Add the frames to the area and adjust the layout as needed to create the mood that you want to achieve. Leave some of the frames empty until you create your final arrangement, and use the empties to cap off the arrangement with interesting photos that pull the whole look together. Take a picture of how you’ve arranged the final layout to use as a quick reference guide once you start hanging the photos on the wall.
Hang the Photos
Grab your hammer and get to work. Start by hanging the largest photos, and then work the additional frames onto the wall according to your prearranged layout. You can also include a few pieces of framed artwork into the grouping, or use a mirror to break things up
Light It Up
If you want to add a little drama to your staircase photo gallery or highlight a specific photo, consider adding extra lighting to the staircase. Install wall sconces on the opposite wall for a gentle gallery-wide glow, install a spotlight to illuminate a specific picture or use track lighting for multiphoto illumination. Lighting isn’t necessary to create a staircase photo gallery, but it can take the arrangement to the next level.
Feeling overwhelmed? We’re here to help. Swing by your local Pottery Barn or book an appointment online to schedule a time for our style experts to help you hang your perfect gallery of photos.


